Split point tips are productive
Especially with small drills, chip forming starts the center A standard drill point has a chisel edge needs to extrude material before it starts cutting. A split point is sharp at the center by thinning the web and creating a primary grind that cuts on center. The result is more effective feed pressure, better positioning, and better center spotting when starting.
How to sharpen split point drills
The first rule is simple: do not treat a split point like a basic jobber drill unless you plan to re-split it afterward. If you only touch up the main cutting lips and ignore the split geometry, you may get some cutting action back, but you will lose much of the self-centering performance.
In practical terms, sharpening a split point is a two-stage process. First, restore the primary cutting lips and point angle. Second, restore the split or web-thinned section so the drill cuts properly at the center. Trying to do both freehand on a bench grinder is possible in very experienced hands, but it is not the most repeatable method, especially on smaller diameters or cobalt and carbide drills.
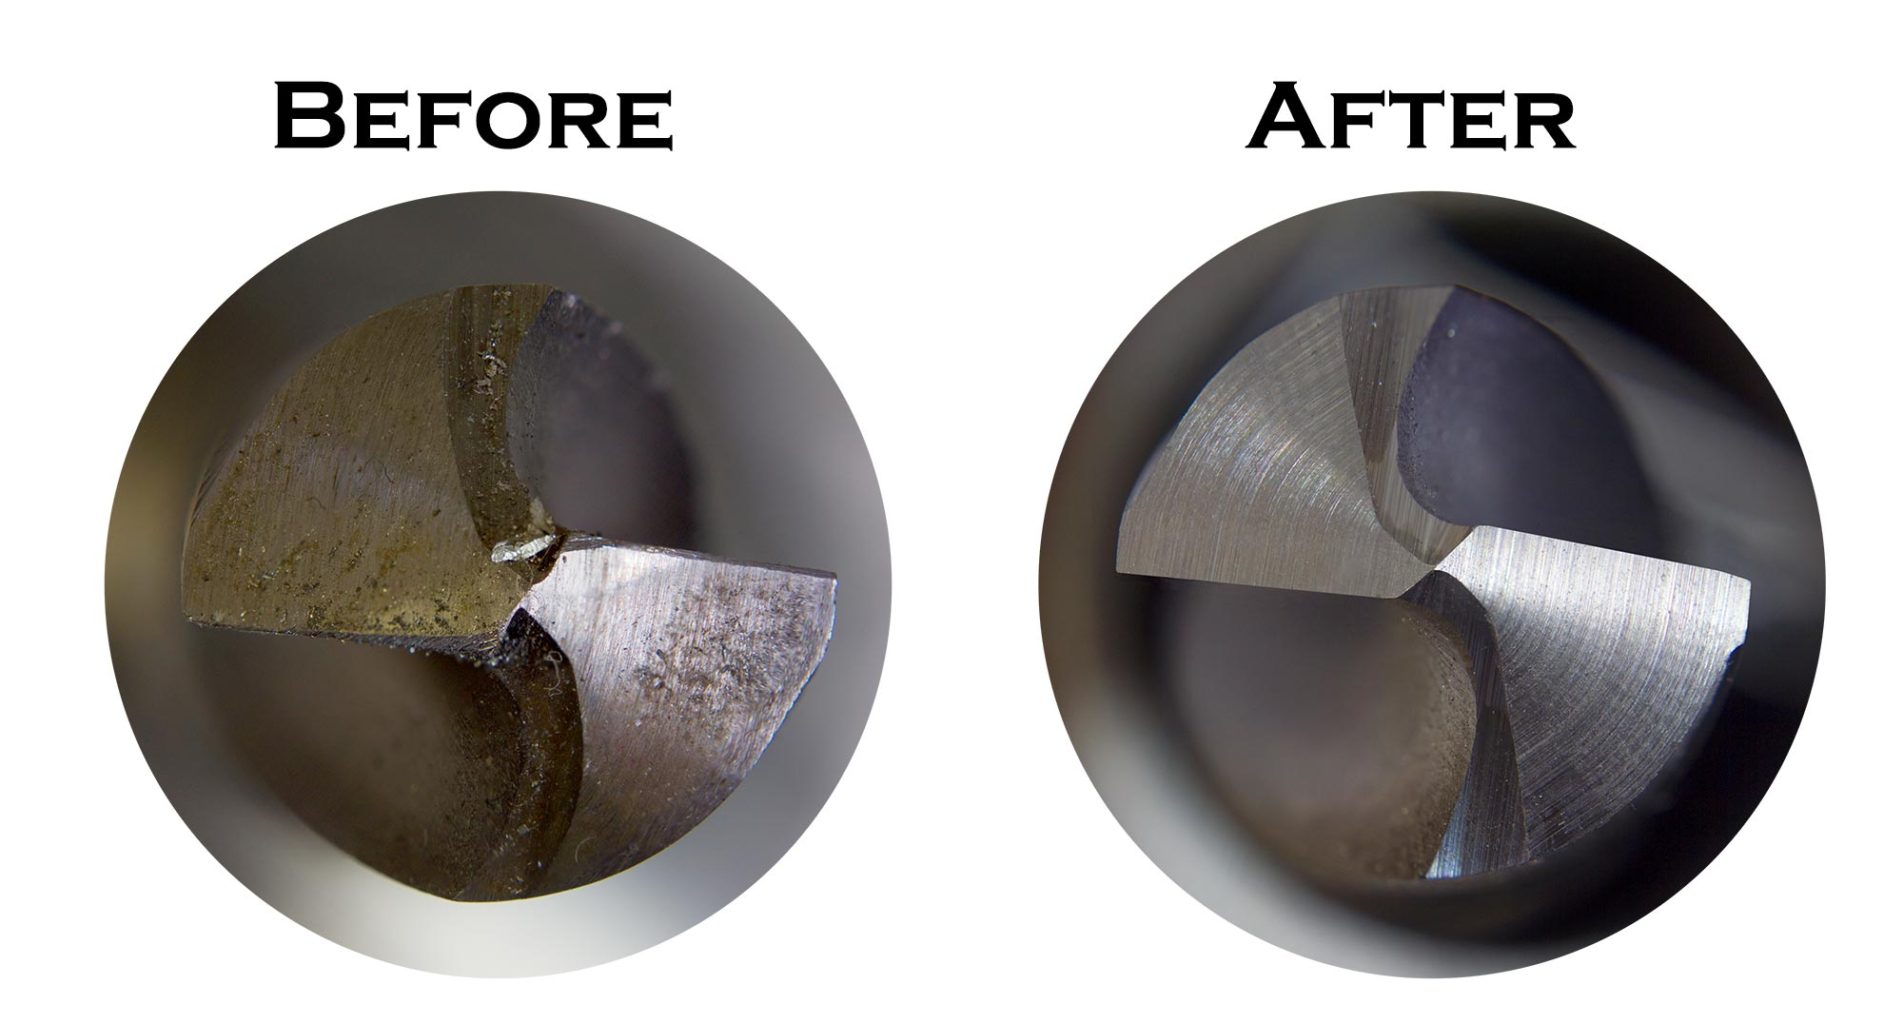
Inspecting the drill
Important drill features: lip wear, point angle, web thickness, and margin condition. If the margins are heavily worn the drill will not longer cut at diameter because the lead edge of the margin is missing, it will therefore cus undersized and the arear of the margin behind the leading edge will rub. in addition If the drill has been sharpened several times, the web will be thicker, meaning a more aggressive point split geometry is reguired, w The drill will produce a good hole if the margins are good. If the drill margin is not good to finish inside the hole with suffer.
Regrind Performance
If a drill has been sharpened too many times, the margins will suffer, affecting the diameter. This means the drill squeezes into the homes that are cutting with sharp cutting lips. As the grind progresses down the length of the drill. The web becomes thicker. In the case of high-speed steel drills that drill specification in a S-907-B. Determines a 0.006 web thickness growth as you progress towards the Shank. If the drill is cobalt. The web will get thicker much faster. This is governed by specification NAS907-J. Which has a web thickness growth of 0.02 per inch. from the tip to the shank
Chip forming begins at the centre. In order for that to take place, the drill must have tip geometry that cuts on center. On a split point, center performance is the whole story.
Another common problem is overheating the point during grinding. Once the edge gets hot enough to discolor badly, it is possible depending on the material one can draw hardness out of the drill locally
Wheel choice matters more than many shops admit. A coarse, hard wheel can remove material quickly but leaves a rougher edge and makes small geometry changes harder to control. A wheel that matches the drill material and the amount of stock removal gives a cleaner result. The right wheel also reduces vibration, which directly affects edge accuracy.
Checking your work after sharpening
Do not judge a sharpened split point by appearance alone. Check the lip lengths, point symmetry, and centered chisel area under magnification if possible. Then test the drill in the material it is meant to cut.
A properly sharpened split point should start with less pressure than a standard point and resist wandering. Chip formation should be balanced from both flutes. If one flute carries more load, the geometry is likely still off. Noise is another clue. A drill that chatters or squeals at normal speed and feed often has a relief or symmetry issue, not just a feed-rate problem.
Hole size also tells the truth. If the drill consistently cuts oversize, check lip equality and point alignment first. If it starts accurately but needs too much thrust, the web probably needs more thinning.
Sharpening in-house
Modern drill point grinders are very easy to use and super productive.
The cost of these machines can usually be recovered in less than a month. Being able to control tip geometry in-house means all your machines run at known speeds and feeds. There are no program modifications. The programmers know what to do. Your setup people understand what to expect.